Analytics

Showing posts with label EduTech. Show all posts

Wednesday, June 1, 2016

Understading Poetry by breaking down Stanzas

Understanding poetry can be tough for students. Understanding older poetry can be very difficult. The vocabulary tends to be antiquated and the examples no longer relevant to the lives students lead.

It doesn't need to be though!

Following is my four step method for helping students understand poetry, though you could also use it for other types of literature.

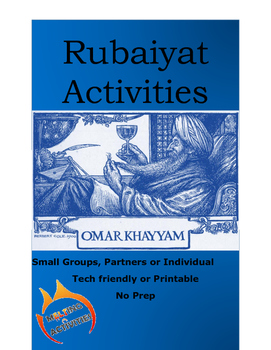
The examples used here are from Edward Fitzgerald's translation of "The Rubaiyat of Omar Khayyam." You can find the worksheets I use with my class as well as detailed reactions available on Teachers Pay Teachers (or by clicking the product cover to the right.

On the other hand you can create your own. Just adapt the following to best suit the literature the needs of your students.

Step 1
Go over the first stanza in the poem. Read it out loud and highlight any words you need to look up. Look up the words and decide the definition that best fits Write that down, so you'll remember it later Now that you know all the words draw the best literal interpretation of the poem that you can. Stick figures are great!  Now that you have the literal meaning,

Step 2
Show you really understand your literal meaning by drawing out a representation of your text. Stick figures and labels are fine for the less artistically challenged. If there's a lot going on, break into into a four grid and draw it out like a comic strip.

This really helps the artistic students shine, and the less artistic still get a chance to really cement their  understanding. Plus, when this is done in groups the discussions are GREAT. Students give input to one another on making things bigger, or brighter, etc.

Step 3
Now that we've got literal in the bag, see if students can identify the big idea and theme of the story. Have students take a step back and see what the stanza is trying to tell them. In one or two sentences they write what they think the meaning is. To really drive it in, they also title their individual quatrain.

Step 4
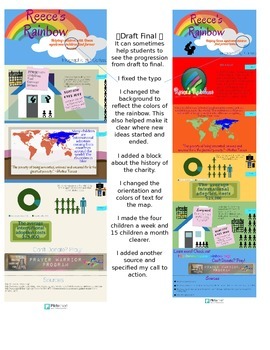
An example using Canva and PhotosforClass
This is the fun part! Students create their own stanza embracing the meaning of the original work. They can practice mimicking the rhyme scheme of the Rubiayat and modernize the stanza.

No Tech: This can be done on paper, cardstock or anything really! Then you can post them around the classroom and see if students can identify the poem as an adaptation of the correct stanza.

Low Tech: Have students create their stanza on Paint,  PowerPoint, or online, consider using Canva. If they are cell phones and tablets they can use free apps like Canva or Phonto. If they get pictures online I STRONGLY encourage photosforclass.com. I am a big digital citizenship nerd, and this gives them pictures that are legal to use AND already cited. Students can print these and again post them around the room to other students to guess.
A not-student-made version that modernizes a stanza

High Tech: Have students create their images online (use the sites suggested in low-tech). Then post these online! I like having students use a Haiku discussion board for this. Students will need an html of their picture. They can get this if they use Canva, or they can upload it to TinyPic or PostImage. Students (in groups) can analyze the modern interpretations and try to guess which stanza it is based off of.

I usually follow this activity up with some traditional comprehension questions that students breeze through! Once they have analyzed a stanza and seen how other students modernize the other stanzas, it really makes understanding easier.

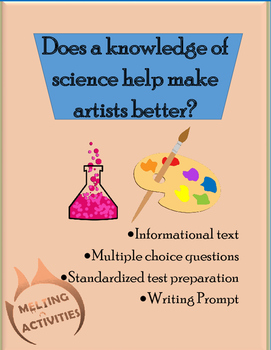
Want more to do with The Rubaiyat? One topic I really like delving into is the fact that in his time Khayyam was best known for his science not his art. Do students think art helps scientists be better? Here's a nonfiction text with multiple choice questions and a writing prompt.

Students tend to hold a bias that artists can't be scientifically smart and scientists can't be creatively skilled, so it is fun to really dive into this discussion with them and have them apply it to Khayyam's works.

Wednesday, April 13, 2016

Quizlet Live 101

I am a long time user of Quizlet. I adore it for independent practice, and while I have sometimes tried to play their games in class (using a white board and volunteer), it hasn't been the easiest.

Just this week I got the e-mail about Quizlet live and I was PSYCHED.

My students and I had just read Gabriel Marquez' The Handsomest Man in the World, and we had about ten minutes left of class. I told them I wanted to try out a new site and asked if they wanted to give it a shot with me. They said sure

So, with very little prep and almost no time reviewing the vocabulary words. I jumped onto Quizlet! Within minutes my students were ready to play (either on laptops or cell phones), and by the end of class (seven minutes later), they were all up and out of their desks near their team actively cheering each other on and  mastering vocabulary together. SUCH A GREAT moment.

If you're a video person, here's a video of how it works.


In short

What is it?
A game students can play in teams that helps them review vocabulary together.

What do I need?
Each student needs internet connection and their own device. Cell phones, tablets, etc all worked fine when we tried.

Is is like Kahoot? Do they need to see my board/screen?
No! Unlike Kahoot, students will be looking at their screen and their screen only, so there's no need for a projector.


How do they win?For every answer they get right they get a point. If they get an answer wrong they lose all their points and start again. The first team to answer every word correctly WINS! The risk of getting zeroed out keeps them from randomly guessing, and keeps the students who are slower still in the game until the very end.

How is this different than other online games we already play?
This is similar to many teacher games in that the students do NOT need a login (wohoo!). This game requires more teamwork than other games. I have used Kahoot and Socrative for group work before, but Quizlet Live students CANNOT play without a group. Granted, they don't need to collaborate with their group. When my students started and the game said to move and sit with their groups they declined... that seemed like a lot of work. However, minutes of the game starting, they were walking around trying to fin their group to help one another.I was (pleasantly) shocked.

Can I use it as a test?I wouldn't. However, at the end it does tell you what words students are confusing and what words students understand. So, it can be used a way for you to evaluate how your class is doing.


How do I do it?
The video will walk you through it. I threw my students in the deep end and they managed to swim, but to make things run a bit smoother I probably would have done the Quizlet demo with them the first time.

There you go! A student tested and teacher approved game that can require very little prep (similar to Kahoot you can use public Quizlets that others have created). To be the best part is that students can continue using Quizlet individually to review if they realized in class they need more practice.

Friday, July 17, 2015

My 2015 Adventure

I am so ridiculously excited abut going 1:1 this year. I think I may be the most excited of all parties involved.

For those who aren't familiar with 1:1, it varies a bit to bit, but basically means that each student will be have a device to use in class. In our case, the students are each receiving a laptop at the start of the term. They will be expected to bring this device to every class and teachers are encouraged to develop ways to have students use their laptops productively.

Last year was my first year at this school and I STRUGGLED with technology. Booking the computer lab wasn't always a guarantee. Plus, those computers tended to be old, slow, and complicated to log onto. Most of my students had laptops, so sometimes I would just tell them to bring their laptops. Then however they would expect me to help trouble shoot the five different models, My favorite was when the exchange students would expect me to help them.

Student: It isn't working for me.
Me: OK, let me look..... your computer is in Chinese... I can't really do much from here. 
Now I know 1:1 isn't a magical key. My students did a lot this year without it! We rocked interactive audio books, used student made review games, fund-raised for charities, made interactive "What Character Are You? quizzes, and used infographics to support a thesis. But imagine what I can do with students having their laptops every day! Plus, students will be able to gain technological literacy on a quasi-daily basis.

Now don't worry, it won't be all typing in my class! Conversation is still key :) Anyways, I just wanted to share a quick post about what I am most excited about next year (it was a close winner, my classroom being the second thing I am psyched about).

I hope this excitement will last me the whole school year, but I am also rather practical. I teach literature after all and know that no hero's adventure was great without obstacles and bad guys. I am sure wifi signals will go in and out, sites will be down, students will be off task, laptops won't be charged and overall chaos will ensure. However, I am really excited that in the end we will have gone on an awesome adventure.

I'd LOVE to know what YOU are excited about for this upcoming school year. For the next week this link-up is open, so feel free to join :)


Monday, April 13, 2015

Why to use CrowdRise for Student Fundraising

How cool is this note from CrowdRise?
I enjoy activities that allow students to show their work outside of the classroom. Even better is when the work has the possibility to change!

One project my students do is create crowdfunding pages. They select a charity and create a website and video fundraising for the nonprofit. This really helps them understand audience, hone their research skills, practice public speaking, and

There are many crowdfunding pages out there; some have very specific audiences that don’t quite match what we do. Kickstarter for example helps people fundraise for something, like a book launch or product creation.

Here are the main reasons I love using CrowdRise for fundraising activities in my classroom:

1. Students should be thirteen with parental consent and guidance
Be a Decent Human!
  •  Some crowdfunding sites require users to be 18. This can be doable, students give their texts to a teacher (or parent) who creates the page. However, it is much easier that the site permits teenagers to create their own profiles.

2. Students (and teachers) NEVER touch the money
  •  I like this project because I can be a decent human, without having to understand the money side of things.
  • A lot of other sites give you the money which you transfer to the charity. This can create issues. Who handles the money? The teacher? The student? Does it go through your school? What paperwork do you need to avoid paying taxes? Gah! You’re trying to show your students that their actions can have a positive change in the world, not that fundraising is crazy chaotic.
  • The website does charge fee, but it is less than 10%

3. The site is very easy to use!
Screenshot explaining how the site works
  • Most charities are already set up, so there's no need to track down tax ID numbers, or accounts payable, etc.
  • This is great for students who like to have options, but can never think of anything. Just have them scroll through the charities on the site. Or, since so many charities are there, have them search for their favorite charity! There’s no getting the charity’s number, or inputting the information. Just click and voila, it is there.
  • The basic set up is already there, and students just add text, graphics, and a video. No coding, or web design skills are needed.

4.  The staff is AWESOME 

Tattoo and Flag
  • They respond to Facebook posts, tweets, and emails with record time! This is from me AND my students.
  • If you send them an e-mail and ask really nicely, they’ll send some CrowdRise swag (maybe stickers, maybe temporary tattoos, maybe something else!). I don’t know about your students, but my students get INCREDIBLY excited about little tidbits. This gives them a little extra focus on the project.
If you have any plans on doing a schoolwide event or want to try a fundraising project similar to the one my students did, then I suggest you look into CrowdRise.

Tuesday, April 7, 2015

Fundraising with your Students

Fundraising in your classroom?

I read a lot about fundraising FOR your classroom, but why not help your students create fundraising pages OUTSIDE your classroom.

A screenshot of a student made video
Why?

So much of school is doing an assignment for your teacher, reading a book for your teacher, giving a presentation for your teacher.

With the use of more technology, many teachers have students share their information outside the classroom via YouTube, or a blog. However, even then, the goal is often that the teacher likes it and it lines up well with the rubric.

An infographic created for a previous project
Pushing things outside of the classroom helps improve the motivation of students. They aren't doing things just for your class, but because they matter in the real world.

With crowdfunding, students have an authentic audience and a real life task. They get to research a charity, find appropriate graphics, and create a video. All of this is done with one goal: to persuade people to donate to their fund.


CrowdRise 101

Below is a list of the CrowdRise pages my students created. Before you check them out here's a quick CrowdRise101 on how to work the page:

  • You can confirm the charity the funds are going to (and click on the name for more information)
  • Read the text that the students have created which should quickly persuade you that the charity is a noble cause.
  • Under the picture you'll see grey circles. These tell you how many graphics or videos the CrowdRise page has. Click the arrows to scroll through. You can see different pictures and hopefully a video the student has shared!
  • Rather self explanatory, but the giant "Donate" button encourages you to make a donation. You can also leave a comment.
  • Questions? Issues? The service button in the bottom right should help.


Student Created CrowdRise Pages

Here are some finished copies. If you have a moment (and possibly $10) to spare, consider making a donation!

  • Families to Build a Miracle. 
    • Build a Miracle CrowdRise Page
      • This was one of the first pages to get a donation.The graphics include infographics students have made, and a rather informational video.
  • MDStudents Building a Miracle
    • Build a Miracle CrowdRise Page
      • As you can see Build A Miracle is a favorite charity with the students. These students have a habit to be very dramatic in their videos. I think you'll agree they are quite emotional!
  • L'Arche USA
    • L'arche USA CrowdRise Page
      • This is one of the most energetic groups I have ever had. I LOVE the video and the page is very clear on what their goals are. Plus, they pronounce L'arche much better than I have managed to do.
  • The Laboure Society
    •  Laboure Society CrowdRise Page 
      • Since I teach at a Catholic school, all of the charities had to be vetted. However, I wouldn't consider all of the charities as Catholic charities. This one however is. I was a little surprised that this group of three boys decided to raise money to help people become priests.   
  •  Divine Mercy Care
    • Divine Mercy Care CrowdRise Page 
      • This was the one group of students who decided to use an animation website (powtunes) to help them make their video. I do wish they would have done a voice over, but the information provided is all really good and I hope you take the time to read it. 
  •  Supporting Mary's Mercy Center
  • The Tomorrow Project 
    • The Tomorrow Project CrowdRise Page
      • I don't think I am supposed to admit this when it comes to a charity project like this, but this is my FAVORITE charity. See what the students have put together and decide whether or not it is your favorite too! Technically this charity is Catholic Charities, but as they do so much students decided to focus on The Tomorrow Project.
Share, Comment, Advise
If you were persuaded, but don't have an opportunity to donate, I'd encourage you to share your favorite page on Twitter or Facebook. Hashtag #CrusadersCrowdfund so my students will know that their pages are being shared and appreciated!

We would also appreciate any comments or advice.

Wednesday, February 11, 2015

Infographic Project - Charity Based Research

My students have done infographics before to practice argumentation and essay structure. This project uses infographics again, but this is a different project that is much more non-fiction and research based.

This project has tons of technology and websites.

I am really excited about it, and about being able to post about it. In total the charity infographic project took three classes, but there was very little homework. I am listing all the steps together here and you can divide them as needed, take steps out if wanted, or add to it. I actually did a bit more (e.g. I worked on using notecards) but here are all of the infographic based steps:
  1. To start, I pass around a sheet of statistics on a topic we are covering: in this case GMOs.We quickly review the statistics and go over whether they are for or against GMOs. Then, I ask students how interesting that was. Most of them say not very.
  2. Using infographics I found online earlier, I show them 10 different GMO statistics we go over each infographic and decide: how does it look, how are the facts, and is it for or against GMOs.
  3. Students on their own think about what they liked about infographics, and what they didn't. What seemed to work, and what fell flat. After some individual work I let them share with a small group, and then we discuss it as a class.
  4. In small groups (2-3) students are assigned to select an infographic about anything they want. They need to know 1. Why they picked the topic 2. Why  they liked it
  5. Students made short presentations on their infographics.
    1. The goal of 1-5 is to introduce students to the topic of infographics and have them get a feel for what they like and don't like. What colors don't work well. When is too much on an infographic too much? Is white space good or bad? etc.  For me, 1-5 took one 90 minute class.
  6. Finally, I let the students know that they will be creating their own infographic on a charity. 
  7. I gave them an approved (they had to be within the guidelines of the school) list of charities and told them to pick whatever one they wanted. They could also pick a different charity, but the school administrators would need to approve it. In groups of two-three students selected a charity.
  8. We went over good sources vs bad sources (we covered this before) and I let them research away. If a student started researching and realized they didn't like their charity, they were allowed to switch.
    • My students spent an entire class researching. While some finished early, most were really working the whole class period. For fast finishers however go to step 9.
  9. After I noticed some students had quite a bit of reliable research ready, I showed them http://piktochart.com/. There are other infographic sites out there, but (for reasons I will discuss in #15) I prefer to use this one. If done researching, students could create an account and begin playing on the site.
  10. I show them an infographic that I made on a charity (I selected one they didn't choose as an example). We go over what we like and what we don't like. We look at the organization pattern, the charts, the visuals, the colors etc.
  11. Examine and review infographic assignment.  Be sure that students understand everything they are expected to do.
    • Using the rubric on the assignment have students grade my infographic.
      • I usually make a few typos, or choose a hard to read font to make sure they give constructive criticism.
  12. Give a quick tour of Piktochart. I like having students learn on their own, but giving them a good start is usually a solid idea.
    • How to sign up
    • Where to start
    • Free vs Paid
    • How to undo
    • Where to find pictures
    • etc.
  13. Allow students to work on Piktochart
  14. Have students submit their Piktochart to me. I make corrections and give it back to them. 
  15. Model Presentation (This is why I like Piktochart! Some other sites have this option as well though.)
    • Using Piktochart's presentation mode I give a presentation justifying why I selected my charity. 
    • I am always sure to make a few easy to spot mistakes so students can correct me
  16. Have students grade my presentation
  17. Let students create their own presentations
  18. Students present their infographics to the class
  19. While presenting, students evaluate the infographic and the quotes
  20. Finally, my students evaluate themselves.
DONE...for now. There's actually a final part, where my students raise money for the charity, but I'll save that for another post.

For now, I'll show you some of my favorite infographics my students created. Click on the charity name to see the whole infographic.

  • San Diego Hunger Coalition was a group that really took advantage of all piktochart had to offer. They had fun picking different backgrounds, and they stuck to small chunks of text (rather than writing everything down). This group was a clear division of labor. One person researched cool facts and statistics, and the other person played on Piktochart until they found the perfect look. Normally I am more a fan of collaboration (rather than divide and conquer), but this group was persistently communicating, so it seemed to work well for them.  
  • L'Arche This student really had fun with the graphics. Every block in her presentation has the same theme, and all of the visuals go with one another. She also added little details where possible. For example, one of the graphics was of a person and it didn't include eyes, so using the shape tools she added them. Her partner missed a few days of school, so she did most of the work on her own, and I was really proud of the final product.
  • Build a Miracle Group was big into incorporating the graphics into the block. That is, nothing was ever stand alone, it was almost one big picture. They also found really great facts to support donating. This group was also one of the most prepared groups when it came to donating. They really worked hard to know their stuff and came across as quite knowledgeable.
  • Finally, Las Hermanas San Diego was a really fun group! They went outside the box a bit, and used the graphics in ways that weren't normal. For example, they used rectangles as surfboards, and put people in normal clothes standing on them to make surfers! Adorable!
Thanks so much for sticking around for the whole post! This really is a fun project it helps teach students about:
  • the good charities do
  • research skills
  • visuals
  • learning how to use new computer programs
  • working in a team
  • organizing their thoughts
  • evaluating one another
  • self evaluating
And of course, the writing and speak skills I am focusing on in my speech class were there (grammar, intonation, transition words, volume, etc.)

I have the worksheets I used available for purchase at TeachersPayTeachers  if you are interested. You can also download the preview for free to see part of it.

Wednesday, October 15, 2014

Creative Character Quizzes

These aren't the quizzes that your students have to study for! These quizzes make your students use their critical thinking skills, inference skills, grammar skills and technology skills...what more could you want?

If your students like taking Buzzfeed quizzes or any quiz online then they will appreciate this assignment.

My students were reading the Crucible, but it can be easily adapted to any book (or even classmates, teachers, local politicians, etc.). For classes that don't read literature I've also used quizzes to review vocabulary.

As a class we discussed what types of questions we could ask. There were two types we discussed:

1. The literal question.
    • These questions asked about things we could literally see. 
      • For example: Would you cheat on your significant other?
        • Never! I am a good honest person.
        • Yes, but I would feel awful later!
        • If they were cute and I liked them.
        • I am very religious so of course not!
    • In this questions we can tell who the answers refer to based on actions or words stated.
        • Elizabeth is a good and honest woman who never cheated.
        • John cheated, but he felt bad.
        • Abigail had an affair with John,so she would be OK with cheating.
        • Hale is a reverend, so he is religious.
2. The symbolic question
    • These questions require more interpretation.
      • For example: What is your favorite color?
        • Black
        • White
        • Red
        • Grey
      • In these question the answer may depend based on who is writing the quiz
        • John Proctor is depressed so he is black.
        • Elizabeth is very innocent so she is white
        • Abigail is passionate so she is read.
        • Hale is grey because he is confused by what is happening in the town and getting more and more depressed.
Once the students understand the differences I gave their requirements.They had to create a 10 question quiz involving four characters. In addition to the quiz they needed to give me a paper that explained their answers.

Once they completed their quizzes they put them online (tryinteract.com is a great site for this) and take at least two other quizzes.

It is a fun project that makes students cite evidence from the text and shows how well they understand the characters.

You can buy the directions and worksheets that go with this for The Crucible on Teachers Pay Teachers at this link

Otherwise be inspired and make your own! Here are two examples from my students


Wednesday, July 9, 2014

Plicker to Check Student Comprehension

I've read on quite a few message forums that many teachers would love to use programs like Kahoot or the Socratic App in their class, but they have problems. Some schools have a strict no cell phones on campus policy. Other students don't have the financial means to each have an electronic device (cell phone, tablet, laptop, etc.). Sometimes my students all have the technology, but the school WiFi is so slow that the apps and websites just don't work.

There are also completely online alternatives like using Google Forms or SurveyMonkey where you can have students answer directly on the site, but often allowing students to take these quizzes online gives them the chance to use notes, or discuss answers with friends. Sometimes great, but not every time.

There are also plenty of old school no tech ways to get students to answer questions. This blog post is about technology that only requires the teacher to have technology.

Plickers is a free app that can be downloaded on Android or Apple products. This version of low-tech meets hi-teach is made possible through the use of  Plicker's cards. There are enough cards for 40 students, so any class of 40 students or less is set! If you are a technophobe, this may be a great first step for you! You will be using a device, but your students won't.

I like to say it is a 10 step program:
  1. Sign up. You can download the app and sign up there, or sign up at their website 
  2. Create a class. This has to be done on the site, not an app. 
  3. Add students. Simply put in your students' names and they will be assigned a card number.
  4. Print the cards (or purchase them from Amazon). If you are printing them yourself I'd suggest you print them on card stock instead of paper. You can laminate normal paper to make it last longer, but sometimes laminating paper causes glare making the reader difficult to work.
  5. Make a poll. This is a "quiz" that your students will answer. You can add questions from the app or the website.
  6. Give the students the question and answer options. This could be on a PowerPoint, Prezi, verbally, or on a piece of paper.
  7. Let your students answer by holding their card up so that the option they think is correct (A, B, C, D) is upright.
  8. Use your tablet / phone to "scan" the class and record your students' answers (anonymously).
  9. Use these answers to immediately decide if students have a grasp of the material, 
  10. Later go back and examine different trends for individual students and try to find ways to help them personally understand the material. This is GREAT to help you differentiate later.
 I don't think this form of technology is useful for every teacher. If you have a 1:1 program in your school you have other options. If you would rather use lo-tech options, that's great too. This is just another tool for your tool belt!

What do you think? Would you ever use Plicker?

Thursday, July 3, 2014

Easily Make Reviews into Gameshows!

You can see how involved students get!
Today’s article for the RTT Teach Abroad August Blog Carnival, If you'd like to contribute to next month's Blog Carnival, please contact Dean and he will help!

Kahoot is a REALLY easy game to set up. You can check out my other post how to find and create your own Kahoot which will be published tomorrow.

What you'll need to use Kahoots with your students:
1. WiFi access: Technically it doesn't need to be wireless internet if they are using laptops or computers directly plugged into the internet, but since most of my students use tablets or cell phone WiFi works best.
2. A monitor: It is really important that all students can see  the monitor. If you have an IWB or projector those work best!
3. Devices: Students will need to have a phone, tablet, laptop, or computer that can access the internet. You don't need to make it one student per device; this can be done in small groups with two-five students per device
4. A Kahoot relevant to your class either made by you or others.

Kahoot basically allows you to make multiple choice quizzes that students can all answer. It makes a great review game, quick quiz, or an exit exam. 


To start the teacher starts the quiz. This will show the Game Pin (figure 1 to the left) on the monitor all students will see. On their devices they enter the Game Pin and then their name (or if they are working in groups their team name). Then their name she should be displayed on the monitor for everyone to see. Once you start the quiz keep in mind that the questions are displayed on the screen with each answer having a different shape and color. Students' devices will ONLY show the colors  (see figure four). If students can't see the monitor they will not be able to play.

You can set a time limit for each question from five seconds to two minutes, but once all of the students have answered the time is up regardless of how long you have given the students.The countdown will play as well as your graphic, the questions and answers.

After all of the students have answered, the correct answer will be displayed as well as a breakdown of how students answered (figure 2). This is an easy way to see not only if the students are mostly getting it wrong or right, but also which incorrect answers they are guessing. Are they missing the modals? Do they not know the irregular verbs? etc. Notice that it doesn't specify who gave which answer! This also takes some of the pressure off students. Unlike calling on a student when they answer this way no one knows if they get it wrong.

I usually take this time to go over why each answer is wrong. Ask the students, "why is blue wrong?" After you've gone over it, you press next and the scoreboard will pop up. Students get points for answering correctly; the faster they answer the more points they get. At the very end of the game the student with the most points will be declared the winner.

I feel like I should briefly point out that I often think that technology in the classroom is superfluous. Teaching our students how to use the internet as a tool to search properly is important. Being able to interact with different software programs is important. However, often teachers tell me, "Oh yeah my students are doing this online and it is awesome," and all I can think is, "how does this really help them more than a pen and paper does?"

This is one of those situations where technology isn't making your class more dynamic. You aren't encouraging more critical thinking. You could make a very similar game using post its and a marker. The perks of this compared to paper alternatives are:
 1. Technology Students LOVE the technology. It makes them more involved and most of them beg for it later! After you finish the Kahoot you can download the statistics to see how your students did. The spreadsheet will show how many questions students go correct and incorrect. It also does a breakdown of each question, and each students' answers to each question. This lets you know what questions are tricky for your students. 
2. Breakdown The technology makes it easy for you to get a breakdown of what questions students are getting right and how specific students are doing.
3. Efficient Pretty fast to set up; for me faster than most review games requiring a bit more prep
4. Paperless! Better for the Earth and your school's budget.

Let me know if you try out Kahoot and what you think! I personally didn't love it when I first tried it, but my students BEGGED for it every day after. Anytime my students like an activity I think it is probably worth sharing.

Sunday, May 18, 2014

Video Games as Literature Assignments

My students are big into technology. I don't think that is really rare in students nowadays, but this is one of the first classes that has been so vocal about it! When I let them know that their assignments can be done virtually they literally tell me, "We love technology"

As a result this year when I started the, "Adaptation Project" I wasn't surprised at all that students were excited. They usually do a great job (as seen in last year's blog post), but this year a group of students asked if they could make an adaptation video game instead of a standard video. Always up to let my students be creative I said yes! The only extra was that they would need to make a, "making of the video-game" video since one of the requirements was that I hear voices.
In the end they came up with this:

Keep in mind that they did create a game! What you are watching now is me "playing" the game (I recorded it).

Interested in having your students create their own video games? Well, these don't involve that much English but Sploder is a good place to start. It doesn't require much skill and can be personalized. Later your students can explain why they chose to depict the story a certain why.

If you have had your students coding (via something like the hour of code) you could probably get more complex.

What do you think? Is an assignment like this suited for your students' levels? How would you change it? What sites would you use?

Tuesday, April 29, 2014

Quick Key and Me! (Getting Set Up)

I briefly mentioned QuickKey in a past post about grading hacks. At that point it wasn't of much use to me because I didn't own an iPhone or iPad. However, for my birthday I received an iPhone! It is an older version, but it still works fine for QuickKey.

Now that I've been using it for a semester, I thought I'd write a quick post about my likes, dislikes and hopes. First off, keep in mind that this app is in Beta. That means it is constantly growing and changing!

To start: I do NOT think that every test should be multiple choice. However, I do teach TOEFL preparation and it would be irresponsible of me not to prepare them for the test format as well as the grammar. I also like using these for quick exit tickets. Simple questions that let me know what I need to reteach and what they understand.

OK, so to start I make a profile with QuickKeyApp super easy! This only requires my email and a password!

Once started create a new class; just give it a name and description (optional). To add students you can download the excel template and fill it out with students' names and emails (optional).  This is probably the longest part, but if you use something like engrade, then you probably already have a list to copy and paste.

From here you make your quiz. Depending on how long your quiz is this will take you a bit.
(Problem 1) You do not NEED to fill in the questions as you will NOT be printing a quiz from this site. That's actually one of the things I don't like :(

However, I usually have my quizzes in a Word document anyways, so this isn't a huge deal. Finally you print the answer sheets so that each student has one.

(Problem 2) They say that in the future you will be able to assign students numbers, but for now they are random. This is problematic because my students kept messing up their numbers. One test I even put their last name and then their number on a piece of paper and had them fill it in when they turned in their test. I still had some students make mistakes. Now I pre-fill in the answer sheets with the student numbers. This is time consuming, but mindless, so I can do it when I am listening to music or watching a movie. Because of this it isn't worth it for me to use QuickKey unless I am really going to save lots of time with the grading.

Later I'll have another post on how to grade and some tips on grading successfully.

What are your thoughts on QuickKey? Have you used it in your classes? Questions on how to use it? Leave a comment; I'd LOVE to hear from you!
Related Posts Plugin for WordPress, Blogger...