Analytics

Showing posts with label Teamwork. Show all posts

Wednesday, July 26, 2017

Have your students introduce YOU to the class

So many teachers right now are asking about
that first day of school. I thought I'd make a quick blog post with a fantastic no-prep, no tech option.

I can only do this one in the summer with incoming freshmen as during the school year I have too many students who already know me (because I taught them during the summer).

Many teachers do this with a fancy handout or PowerPoint. Since I never know the status of my classroom the first day (e.g. How many students? Will I have technology?) I keep this no-prep and easy.
  1. I warmly welcome students to my class and ask them what kinds of things teachers usually share about themselves the first day. As they give me answers I write them on the board
    • Home city, If they have kids, Professional background, etc.
      • If students don't guess right away you can nudge them, but I usually get a pretty good list.
  2. We sort the list into three different categories
    • Usually we get something like:
      1. How does she teach?Teacher Type
        • We tie this into rules and expectations too.
      2. What has she done? Background
        • Professional, Personal
      3. What does she like and dislike? Personality
        • I have LOTS of "me" around the class, if you don't you may not want to include this.
  3. I pass out scratch pieces of paper and tell them to walk around the classroom and find any evidence they can that shows them who I am as a teacher. 
    1. Depending on how involved they are, I usually give about five minutes.
      • If they're just sitting or staring at one spot. End it sooner. But they're usually into it.
    2. You may need to set more guidelines depending on your privacy. I let them open any drawer that is unlocked and have even had a (rather brave) student ask if he could look in my purse. I allow it! 
  4. Stop the class and have them see what evidence someone else collected. Sharing is caring!
  5. Tell them now they are going to take the evidence and explain how it tells them who I am. I usually give an example
    1. Ms. Peck has almonds on her desk. This tells me she is trying to eat healthy.
    2. I also model using different evidence to support the same conclusion: Ms. Peck has almonds on her desk and bike pedals under it. This tells us she wants to be healthy.
    3. As I say this I also write it on the board. Then I erase my specific terms and the students are left with a sentence frame: Ms. Peck has _______ This tells me ______.
  6. As this is a little more intense, they'll be in groups (I like my groups of 3-4 students so divide appropriately) I also assign each group a category: personality, teaching, background
  7. Give them some more time (2-5 minutes) to gather more evidence now that they have a category and goal.
  8. Encourage students to focus on the evidence they have to create a mini-presentation on what type of teacher Ms. Peck is.
  9. Students present!
    1. As students present I praise them for their conclusions even if they are wrong..
      • Example: I had a student infer I was Native American because of my complexion and the dreamcatcher in my class. I shared I was Mexican and the dream catcher was for a different reason. Then as a class I tried to get them to guess (I taught American literature)
    2. Other times they are right but their evidence doesn't support it.
      • Example: I had a student infer I loved to travel because of my travel signs in the classroom (that pointed to Rome, London, etc.) I explained those were because I teach World Literature and asked if anyone saw any evidence that I love to travel other that those? (My diploma from Spain, the picture of me riding an elephant)
  10. You're done! Congratulations you had a first day where students got to:
    • Work in teams
    • Find evidence
    • Think critically
    • Make inferences based on evidence
    • Learn about you
    • Move around
    • I feel awkward calling this student centered, as it's all ABOUT the teacher, but the students do all the heavy lifting.
    • And had fun! 

Monday, September 19, 2016

Jigsaw Kahoot for Collaboration

As an ESL teacher I've always been a HUGE fan of making students talk to each other. It could be about their day, what we've read, or working on questions together. In my opinion we cannot teach English to be just writing and formal presentations, they need to speak and collaborate with one another.

Now, I teach a lot more literature, though many of my students are still ESL students, and I still find that they should be talking to one another!

A long loved activity of teachers to encourage collaboration has been the jigsaw (no puzzle required). This blog will discuss the traditional jigsaw and throw in a more modern endings by adding Kahoot. As always there are other low tech or no tech ways to achieve this that will be discussed.

The next lesson I teach is Oedipus Rex, so that's where well start.

Prep Work
Readings. I am very fortunate to have small class sizes (under twenty students). You'll essentially be creating two different sets of groups. I do this with colors and shapes. For the sake of simplicity, pretend you have a class of nine students. I would group them into: Star, Circle, Triangle, Star, Circle, Triangle, Circle, Star, Triangle.

That means each student is in two different groups: color and shape. These groups don't need to be exactly the same, but it is helpful (so in a class of 15, you could have 3 shapes and 5 colors). Keep in mind that how ever many colors you have, that's how big the groups will be at the end. I don't like having them much bigger than 5, and some teachers may want it smaller than that.

For this class, I did it by column and note cards.

Each row has shared readings (and the same color note card) and the columns can easily get together when the groups need to be composed of different colors.

Readings
Each text is labeled with a different color. You can differentiate a bit here.  In this class seating arrangements are actually purposefully arranged so I can do activities like this and have similar students across. If I want students working with someone similar to them, then they face left or right. If I want a more mixed group they look forward or back.

Some things to consider are to give a slightly more difficult text to the students at higher reading levels, and a slightly easier text to students who struggle more with reading. Sometimes I have one group watch a video, one group listen to a song, and one group read a short news article.

To start, each student listens / reads / watches their assignment and answers the questions given. This is usually done on their own.

This can also be done in more of a literary circles fashion. All students are reading the same text, but different colors are focusing on different sections (vocabulary, plot, character development, etc.)

In this case I gave students ten minutes to read their article and take the best notes they could take on their note card.

Small Group Check
Once done, students move into a small group with everyone who has the same color as them. As they all had the same assignment they have the chance to share out here. Did they not understand something? Do they need more guidance? Did someone see something no one else did?


Mixed Groups Share
This is where it gets fun. Students move to another group that has the same shape, but DIFFERENT colors. They leave their worksheets behind, but get to bring their note cards with them. That means all of these students are joining the group with new information. They are the resident experts, and where the jigsaw activity gets its name. Each student has a piece of the puzzle and everyone needs to pitch in to make the puzzle complete.


In many cases they simply share with one another to complete a worksheet or let other students add to their notes. I've seen some teachers pass out a "Group test" and the group is graded based on the answers they come up with together. However, to add some fun to it this is a GREAT time to play Team Kahoot.

Many of you know I love Kahoot. I've blogged about making Kahoots as a teacher, and having your students make them. Team Kahoot, was a new function brought up this Spring. It's great for classrooms with limited tech as more than one student can sign on as part of the same team.

In this case it's great because the questions are made based on ALL of the colors, so one student can't dominate and take over for everyone else. Instead all of the students need to work together. You can see the Kahoot here in all its glory.

I did this today with my class of 15. It took us a solid 45 minutes which included reading, note-taking, making groups, Kahooting, and me explaining while we Kahooted. Students LOVED it and it was a great way to prepare them for Oedipus Rex next class.

Any questions or comments let me know below or tweet me at mELTingTeacher. I'd love to know if you plan on using something like this as is or adapting it to your class.

Wednesday, April 13, 2016

Quizlet Live 101

I am a long time user of Quizlet. I adore it for independent practice, and while I have sometimes tried to play their games in class (using a white board and volunteer), it hasn't been the easiest.

Just this week I got the e-mail about Quizlet live and I was PSYCHED.

My students and I had just read Gabriel Marquez' The Handsomest Man in the World, and we had about ten minutes left of class. I told them I wanted to try out a new site and asked if they wanted to give it a shot with me. They said sure

So, with very little prep and almost no time reviewing the vocabulary words. I jumped onto Quizlet! Within minutes my students were ready to play (either on laptops or cell phones), and by the end of class (seven minutes later), they were all up and out of their desks near their team actively cheering each other on and  mastering vocabulary together. SUCH A GREAT moment.

If you're a video person, here's a video of how it works.


In short

What is it?
A game students can play in teams that helps them review vocabulary together.

What do I need?
Each student needs internet connection and their own device. Cell phones, tablets, etc all worked fine when we tried.

Is is like Kahoot? Do they need to see my board/screen?
No! Unlike Kahoot, students will be looking at their screen and their screen only, so there's no need for a projector.


How do they win?For every answer they get right they get a point. If they get an answer wrong they lose all their points and start again. The first team to answer every word correctly WINS! The risk of getting zeroed out keeps them from randomly guessing, and keeps the students who are slower still in the game until the very end.

How is this different than other online games we already play?
This is similar to many teacher games in that the students do NOT need a login (wohoo!). This game requires more teamwork than other games. I have used Kahoot and Socrative for group work before, but Quizlet Live students CANNOT play without a group. Granted, they don't need to collaborate with their group. When my students started and the game said to move and sit with their groups they declined... that seemed like a lot of work. However, minutes of the game starting, they were walking around trying to fin their group to help one another.I was (pleasantly) shocked.

Can I use it as a test?I wouldn't. However, at the end it does tell you what words students are confusing and what words students understand. So, it can be used a way for you to evaluate how your class is doing.


How do I do it?
The video will walk you through it. I threw my students in the deep end and they managed to swim, but to make things run a bit smoother I probably would have done the Quizlet demo with them the first time.

There you go! A student tested and teacher approved game that can require very little prep (similar to Kahoot you can use public Quizlets that others have created). To be the best part is that students can continue using Quizlet individually to review if they realized in class they need more practice.

Monday, January 4, 2016

Zombies and Teamwork

In addition to my year long English courses I teach two semester classes. As the new year starts, I begin a new class as well: speech!

I LOVED taking speech as a student, so it is really fun to teach it now.

As most of my readers know, many of my students do not speak English as their first language. Sometimes this isn't an issue, and they are motivated to speak, write, and read in English. In other cases however, there is a tendency to use as little English as possible. As a result, I use an adapted version of a team building activity I love. The point? To show them that they don't need to rely on language...period.

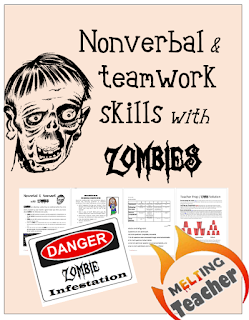
https://www.teacherspayteachers.com/Product/Nonverbal-Skills-and-Teamwork-with-ZOMBIES-2282999I love using this to start my speech class as it focuses on nonverbal skills (something many students lack). It also builds their teamwork (key since this class involves LOTS of  group projects). Finally, it involves some critical thinking which I feel is always a plus.

Without going into too much detail, students are divided into groups of three to four and the dire situation is explained. The tower that normally keeps the zombies away has fallen and it is up to this group of students to reassemble it without going into the zombie zone.

Of course, as zombies are VERY sensitive to noise, they must work in complete silence with absolutely NO talking.

Students are graded based on their teamwork, their ability to follow the rules, and whether or not they complete the mission.

To be honest, this is an old activity (though I used to teach it with nuclear issues instead of zombies). I wasn't sure how it would go with my students. I hit a few speed bumps early on. Normally, I use hula-hoops taped to the ground as the city barrier, but my trusty dollar store was out, so I taped off squares instead (amusing since all of my directions stated circles, but students got it).

You can download a free preview of the Zombie Teamwork activity at TeachersPayTeachers which basically explains the concept in more details, but here's a step by step guide of setting your classroom up.

Supplies 

You can use a lot of things to make this happen, but you NEED string, cups, and rubber bands (the rubber bands should be able to expand to go around the cups). You can give the students pre-cut string, or one loooooong piece and scissors.

Other things you'll need
  • A way to make an enclosed section (hula hoop taped to the ground, chalk, tape, etc.). 
  • Random school supplies (You don't NEED this, but I like to give the students random things and see what they can do. Today they had: Velcro strips, pennies, paper clips, a high lighter, pencil erasers, pencils, and binder clips

  • I also like to put little Lego men inside the city. I would put zombies inside, but I don't have any zombie toys, so I tell my students the zombies are invisible.
Set Up
  •  You'll need space. I don't like the groups to be much bigger than four students, and each group needs at least 3 square feet to work in. Spread them out so they aren't sitting on top of one another. Each group gets a "city" The cities should all be the same size and have three cups inside, Lego men inside, and a cup or box with all of their supplies nearby.
  • I didn't get a chance to this time, but you can usually score some really cheap zombie decor after Halloween. Anything you can throw in the room gives it that extra appeal. My students likes my DANGER ZOMBIE INFESTATION signs I had on the door and around the classroom.
  • I leave copies of the directions (one per group) by their city as well.
 Buy In
  • I HAVE taught this class without speaking, but for my students this year we walked through the directions. They were intrigued from the start! I am glad I went with zombies this year...the topic definitely caught their attention.
Variations
Depending on the group of students you have, there are MANY different ways to have them build the tower. Have it be a three cup pyramid, or a six cup pyramid. Have one student be blind-folded etc. There are more variations discussed in detail in the pack, but get creative!

Results
Walking around I was really impressed with my students. They were working together, getting creative and learning from their mistakes.

What did students think? One of my favorite parts of this lesson is the debriefing where they can sit and reflect on what they did and why they did it. Here are some of the insights my students shared with me:

"I learned that communication is more than just the words that come out of our mouth. It is also what we do with our bodies"

"I learned that I can get things done if I just put my mind to work."

"I solved most of the problems we had not talking by paying more attention and not being lazy. Basically, I had to think harder" 

The best part? A student who stopped by after class, "I just wanted to tell you that your class was really fun today!" Well heck! That makes it a better day.

Takeaway
If you have a new batch of students in January and want a fun activity, or you think your students would do well with some practice in group work. This is a great zombie download for you. Until the 6th it is only $2.20 (that's 20% off the normal price of $2.75). Try it out and let me know what your students think.

If you don't have it in your budget right now, enter to win below! You get one free entry just for reading! You can earn more by tweeting or pinning. The contest opens the fifth and closes the tenth!

Thursday, January 30, 2014

Peer Learning- We're better together

One of the first things I learned when I started teaching English was the importance of pair work. This guest post makes some suggestion on when to embrace learners working together, and why it is best to not rely on it constantly.

Helping someone is a way to cement your own knowledge
Have you ever witnessed one student leaning over to lend some help another student better understand a problem or dilemma? 
If so, you have likely seen peer learning. When students get together to help one another learn a difficult subject or think critically about a problem, they take their education to a deeper level opening their minds to a new thought process. This new level of learning can help peers open up their minds and encourage them to work well with other students, regardless of which side of the learning curve they are on.
Yet there are some struggles that come along with peer to peer learning that can make this typically highly effective way of learning a challenge. The following are some of the do’s and don’ts for teachers to help encourage peer learning in the right way.

The Do’s of Peer Learning
Learning to work together is a lifelong skill!
  • Do encourage teamwork –
    Teamwork is something that people experience throughout their lives. In some cases they will be the leader in the group, or in the case of peer learning the person doing the teaching. In other cases, they will be the person sitting back taking instruction, or the student. In either case, knowing how to work well with one another is a crucial. When you allow peer learning in the classroom you not only help students learn the material but you set them up for an important inherent life lesson that they will need in a variety of situations.
  • Do allow students to work together on problems –
    Sometimes there will not be a clear leader in a peer learning. When students come together in peer groups to brainstorm solutions to problems, they can work together equally to come up with the best solution. This teamwork is another common occurrence in daily life even after students are finished with their schooling.
  • Do let peers assess each other’s achievements –
    Another form of peer learning is to grade each other’s work. This is beneficial because it allows students to see and learn from the mistakes other students made as well as how they were able to solve certain problems. By doing this, they learn what their peers are doing and can find new ways to conquer challenges that they may not have learned about before. When they learn from like-minded individuals on how they solve problems, then they are able to use these skills in other situations to advance their education even further.
The Don’ts of Peer Learning
Working together is great, but the teacher should still be a part of the class
  • Don’t allow bullying –
    In some cases peer learning can lead to one person bullying another. This typically happens when one student is struggling with a particular subject and is being tutored by a peer who is better able to grasp it. When one student becomes frustrated with the other, they can begin to bully the student which can have adverse effects. As a teacher, it is important to watch for these signs and stop the peer learning before it gets worse.
  • Don’t rely solely on peer learning –
    Teachers sometimes rely too heavily on peer learning and step back from their role as administrator of the classroom. This can also have adverse effects because students will not receive knowledge from the teacher that they need to get the most out of their education. A good balance is imperative with peer learning and classroom learning with a teacher.
As a teacher, finding a way to incorporate peer learning into the classroom is a good way to mix up the curriculum and teaching methods so students can work together more and enjoy their classroom time. To do this most effectively it is important to balance between lectures and one-on-one lessons with a teacher and work in peer groups. 

This guest post was written by Aileen Pablo who actively blogs about education. She uses research from: davecormier.com
Related Posts Plugin for WordPress, Blogger...