Analytics

Tuesday, May 19, 2015

Finals Goodie Bags


My students start final exams on Friday! This year has gone by so fast!!

I remember when I was a freshman final exams were petrifying. As I got older they got less scary, but were also intense. I wanted to make my students something that would help them as finals rolled around and hopefully help them de-stress (a bit).

Here you can see a photo of the little "Finals Survival Kits" I made. They cost about $50 to make 80 full bags with a 20 extra that didn't quite have everything (which I'm going to divvy up with a slightly different note to some of the teachers and staff). The note attached states:

As this year comes to an end you have just final exams left! This Finals Survival Kit is from me to you thanking you for a great first year at Mater Dei and wishing you the best. 

If I don't teach you again next year, I am still available to help you during lunch, and before or after school. Otherwise, have a GREAT summer and I'll see you next year!

This kit includes:
  • A pencil to help you write the right answers
  • A grip to keep you holding on when things seem tough
  • An eraser for when you make a mistake
  • A pencil sharpener to keep you sharp during testing
  • A lifesaver for when you need a little extra help
  • A sticker to help you stick to it even when things seem hard
  • And some chewy candies because I didn't want to add anything else hard to finals week!

Best of  luck and know that I believe you can do this!

Things I thought about including, but didn't because I was sure they would just end up in the trash:
A bouncy ball to remind you to keep having fun
A toothpick to help you pick the right answer
A candle for late nights studying (birthday candles work well)
A paperclip to hold everything together
A rubber band so you stay flexible when you want to get stressed
Gum to remind you to stick to it! (Gum is against school rules, so I didn't want to go there)

Do you do anything special for finals or the end of the school year?

Monday, April 13, 2015

Why to use CrowdRise for Student Fundraising

How cool is this note from CrowdRise?
I enjoy activities that allow students to show their work outside of the classroom. Even better is when the work has the possibility to change!

One project my students do is create crowdfunding pages. They select a charity and create a website and video fundraising for the nonprofit. This really helps them understand audience, hone their research skills, practice public speaking, and

There are many crowdfunding pages out there; some have very specific audiences that don’t quite match what we do. Kickstarter for example helps people fundraise for something, like a book launch or product creation.

Here are the main reasons I love using CrowdRise for fundraising activities in my classroom:

1. Students should be thirteen with parental consent and guidance
Be a Decent Human!
  •  Some crowdfunding sites require users to be 18. This can be doable, students give their texts to a teacher (or parent) who creates the page. However, it is much easier that the site permits teenagers to create their own profiles.

2. Students (and teachers) NEVER touch the money
  •  I like this project because I can be a decent human, without having to understand the money side of things.
  • A lot of other sites give you the money which you transfer to the charity. This can create issues. Who handles the money? The teacher? The student? Does it go through your school? What paperwork do you need to avoid paying taxes? Gah! You’re trying to show your students that their actions can have a positive change in the world, not that fundraising is crazy chaotic.
  • The website does charge fee, but it is less than 10%

3. The site is very easy to use!
Screenshot explaining how the site works
  • Most charities are already set up, so there's no need to track down tax ID numbers, or accounts payable, etc.
  • This is great for students who like to have options, but can never think of anything. Just have them scroll through the charities on the site. Or, since so many charities are there, have them search for their favorite charity! There’s no getting the charity’s number, or inputting the information. Just click and voila, it is there.
  • The basic set up is already there, and students just add text, graphics, and a video. No coding, or web design skills are needed.

4.  The staff is AWESOME 

Tattoo and Flag
  • They respond to Facebook posts, tweets, and emails with record time! This is from me AND my students.
  • If you send them an e-mail and ask really nicely, they’ll send some CrowdRise swag (maybe stickers, maybe temporary tattoos, maybe something else!). I don’t know about your students, but my students get INCREDIBLY excited about little tidbits. This gives them a little extra focus on the project.
If you have any plans on doing a schoolwide event or want to try a fundraising project similar to the one my students did, then I suggest you look into CrowdRise.

Tuesday, April 7, 2015

Fundraising with your Students

Fundraising in your classroom?

I read a lot about fundraising FOR your classroom, but why not help your students create fundraising pages OUTSIDE your classroom.

A screenshot of a student made video
Why?

So much of school is doing an assignment for your teacher, reading a book for your teacher, giving a presentation for your teacher.

With the use of more technology, many teachers have students share their information outside the classroom via YouTube, or a blog. However, even then, the goal is often that the teacher likes it and it lines up well with the rubric.

An infographic created for a previous project
Pushing things outside of the classroom helps improve the motivation of students. They aren't doing things just for your class, but because they matter in the real world.

With crowdfunding, students have an authentic audience and a real life task. They get to research a charity, find appropriate graphics, and create a video. All of this is done with one goal: to persuade people to donate to their fund.


CrowdRise 101

Below is a list of the CrowdRise pages my students created. Before you check them out here's a quick CrowdRise101 on how to work the page:

  • You can confirm the charity the funds are going to (and click on the name for more information)
  • Read the text that the students have created which should quickly persuade you that the charity is a noble cause.
  • Under the picture you'll see grey circles. These tell you how many graphics or videos the CrowdRise page has. Click the arrows to scroll through. You can see different pictures and hopefully a video the student has shared!
  • Rather self explanatory, but the giant "Donate" button encourages you to make a donation. You can also leave a comment.
  • Questions? Issues? The service button in the bottom right should help.


Student Created CrowdRise Pages

Here are some finished copies. If you have a moment (and possibly $10) to spare, consider making a donation!

  • Families to Build a Miracle. 
    • Build a Miracle CrowdRise Page
      • This was one of the first pages to get a donation.The graphics include infographics students have made, and a rather informational video.
  • MDStudents Building a Miracle
    • Build a Miracle CrowdRise Page
      • As you can see Build A Miracle is a favorite charity with the students. These students have a habit to be very dramatic in their videos. I think you'll agree they are quite emotional!
  • L'Arche USA
    • L'arche USA CrowdRise Page
      • This is one of the most energetic groups I have ever had. I LOVE the video and the page is very clear on what their goals are. Plus, they pronounce L'arche much better than I have managed to do.
  • The Laboure Society
    •  Laboure Society CrowdRise Page 
      • Since I teach at a Catholic school, all of the charities had to be vetted. However, I wouldn't consider all of the charities as Catholic charities. This one however is. I was a little surprised that this group of three boys decided to raise money to help people become priests.   
  •  Divine Mercy Care
    • Divine Mercy Care CrowdRise Page 
      • This was the one group of students who decided to use an animation website (powtunes) to help them make their video. I do wish they would have done a voice over, but the information provided is all really good and I hope you take the time to read it. 
  •  Supporting Mary's Mercy Center
  • The Tomorrow Project 
    • The Tomorrow Project CrowdRise Page
      • I don't think I am supposed to admit this when it comes to a charity project like this, but this is my FAVORITE charity. See what the students have put together and decide whether or not it is your favorite too! Technically this charity is Catholic Charities, but as they do so much students decided to focus on The Tomorrow Project.
Share, Comment, Advise
If you were persuaded, but don't have an opportunity to donate, I'd encourage you to share your favorite page on Twitter or Facebook. Hashtag #CrusadersCrowdfund so my students will know that their pages are being shared and appreciated!

We would also appreciate any comments or advice.

Wednesday, March 18, 2015

Getting a Full Nights Sleep

Many of my students (and colleagues) struggle to get a full nights sleep. As great as it is to live in a time of the internet and social media, it does mean that sometimes time escapes from me and before I know it... I've spent three hours blog hopping.

These are three websites that I suggest to my students (and friends) that may help you get some more shut eye.

In my study skills classes we are talking about how to study without distractions and http://www.getcoldturkey.com/ came up. Students can use it to set times where social media is “blocked.” For example, they can set 6:00pm-8:00pm as their homework time and have Facebook, Twitter, and 9gag blocked.  

To be honest, I find that site a bit cumbersome, and personally I use minutesplease.com/5minutes/facebook.com as a way to, “reward” myself when grading without worrying about getting sucked in. You just put how many minutes you want to visit a site and then the site name and it will open a window that is only open for that long. So, minutesplease.com/15minutes/gmail.com puts me on my personal gmail for 15 minutes and then closes the window. This is great if you want to do something like put aside 10 minutes every morning to read news. This lets you stick to that limit without getting sucked into the internet for too long.

Not all of us are night owls
On another note, I’ve had some students complain that working on the computers at night keeps them up. It's true, the light of a computer screen messes with your brain's natural clock. Luckily, https://justgetflux.com/ is a nice download. It works with your time zone to change your screen's lighting based on the sun. In layman's terms, When the sun has set it uses warmer colors that don’t mess with your body as much and let you go to sleep more easily.

Finally, I occasionally rock http://sleepyti.me/ This site helps you find the ideal time to fall asleep. The idea is that we sleep in cycles that normally last about 90 minutes. When we wake up in the middle of a cycle, we feel like we didn't sleep well. The calculator lets us find the best times to fall asleep so that we can wake up at the end of a cycle. This way even if you don't get as much sleep as you would like, you won't wake up feeling like you slept badly. 

What about you? Any great sites you use to limit time online or help your body go to sleep faster?

Monday, March 16, 2015

No Name!


I think one of the most frustrating things for me as a teacher is giving somebody a zero because I didn't have their name on the paper.

My policy is to put any no-names on a section of the board. Papers stay up their for a week, and then they get trashed.

I dislike giving them zeros, but if a students doesn't at least look for their papers.... well I guess that's what they get. Students need to learn to put their names on papers; however, if they've done the work, I really want to give them credit.

I've seen three basic ways teachers deal with this.

1. Preventative
These are things like using the "names on the paper" song, or requiring students to highlight their names before they submit assignments.

To be honest, I feel like these methods work FANTASTICALLY. However, many of my high school students will roll their eyes at this one. I want them to feel like responsible adults, not like they are being babied.

As a result, I would suggest this method for younger grades only, unless you can think of a way to make it a bit more age appropriate for older students (if so let me know!).


In the meantime, if you want to try these in your class, check out this freebie on the left from Amazing Documents.

If you want song lyrics instead, the name song created by Rikki Lee (and found to your right has been downloaded over 500 times).


2. On Display  
Similar to my whiteboard, a lot of teachers create a section to display no named papers. I've actually seen a few different ways:

Wall: The simplest is by putting it on a white board or bulletin board, but you can be creative with it. Check out the following freebies you can snag.

https://www.teacherspayteachers.com/Product/No-Name-Solution-Whiteboard-Signs-FREEBIE-844866Mrs Fun to Know has this freebie with eight different half page notes. I especially love the Owl and Pirate themes.  These are perfect if you have a folder, white board, or bulletin space, for no names. Mostly this is because I have a thing for puns.

https://www.teacherspayteachers.com/Product/No-Name-Poster-If-You-Wanted-Credit-1557842
The husband wife teaching duo over at CreatedForLearning.blogspot.com are big believers of no shaming in the classroom. They used to have a, "No Name Hall of Shame," but have since changed it to the delightful image you see on the left, "If you wanted credit, then you shoulda put your name on it..." You can grab this poster for free!


Quite a few teachers have picked up on the Beyonce rhythm that the previous verbiage lends itself to. The one on the left  is by Erica Speaks over at TeachingSpeaksVolumes. The one on the right is from The Counseling Teacher.


Trash:
I know a few teachers who buy mini-trashcans and use these (Target's Dollar Spot, or any dollar store should have these). This is a fantastic visual because students can see that by not putting a name on their paper they are essentially putting these points in the trash. Here's a freebie there's a no name monster you can attach to trash can. Students search through this trash can to find their paper.


Tombs:
Some really creative teachers make tombs for a no named student. Students can help decorate, or you can snag this freebie  on teachers pay teachers. Very cute although it takes a it more space and possibly time.

What to do when a student recognizes their work? Now this changes from teacher to teacher. Some teachers do not take points off. Some teachers take of a few points (5%-10%), Whereas others take off a significant number of points (50% and more).

Some teachers keep the papers up all semester, the entire unit, or for just a week.

3. Trash 
Finally, some teachers don't even give students a chance to claim their work. They find something without a name and it goes directly to the trash. Harsh? Maybe, but  the hope is after one or two times students will shape up and adjust.

What do you do? I am hoping going 1:1 next year will cut down on this as electronically submitted documents are submitted via students' accounts (and thus named).

Thursday, March 12, 2015

Great Gatsby house of cards

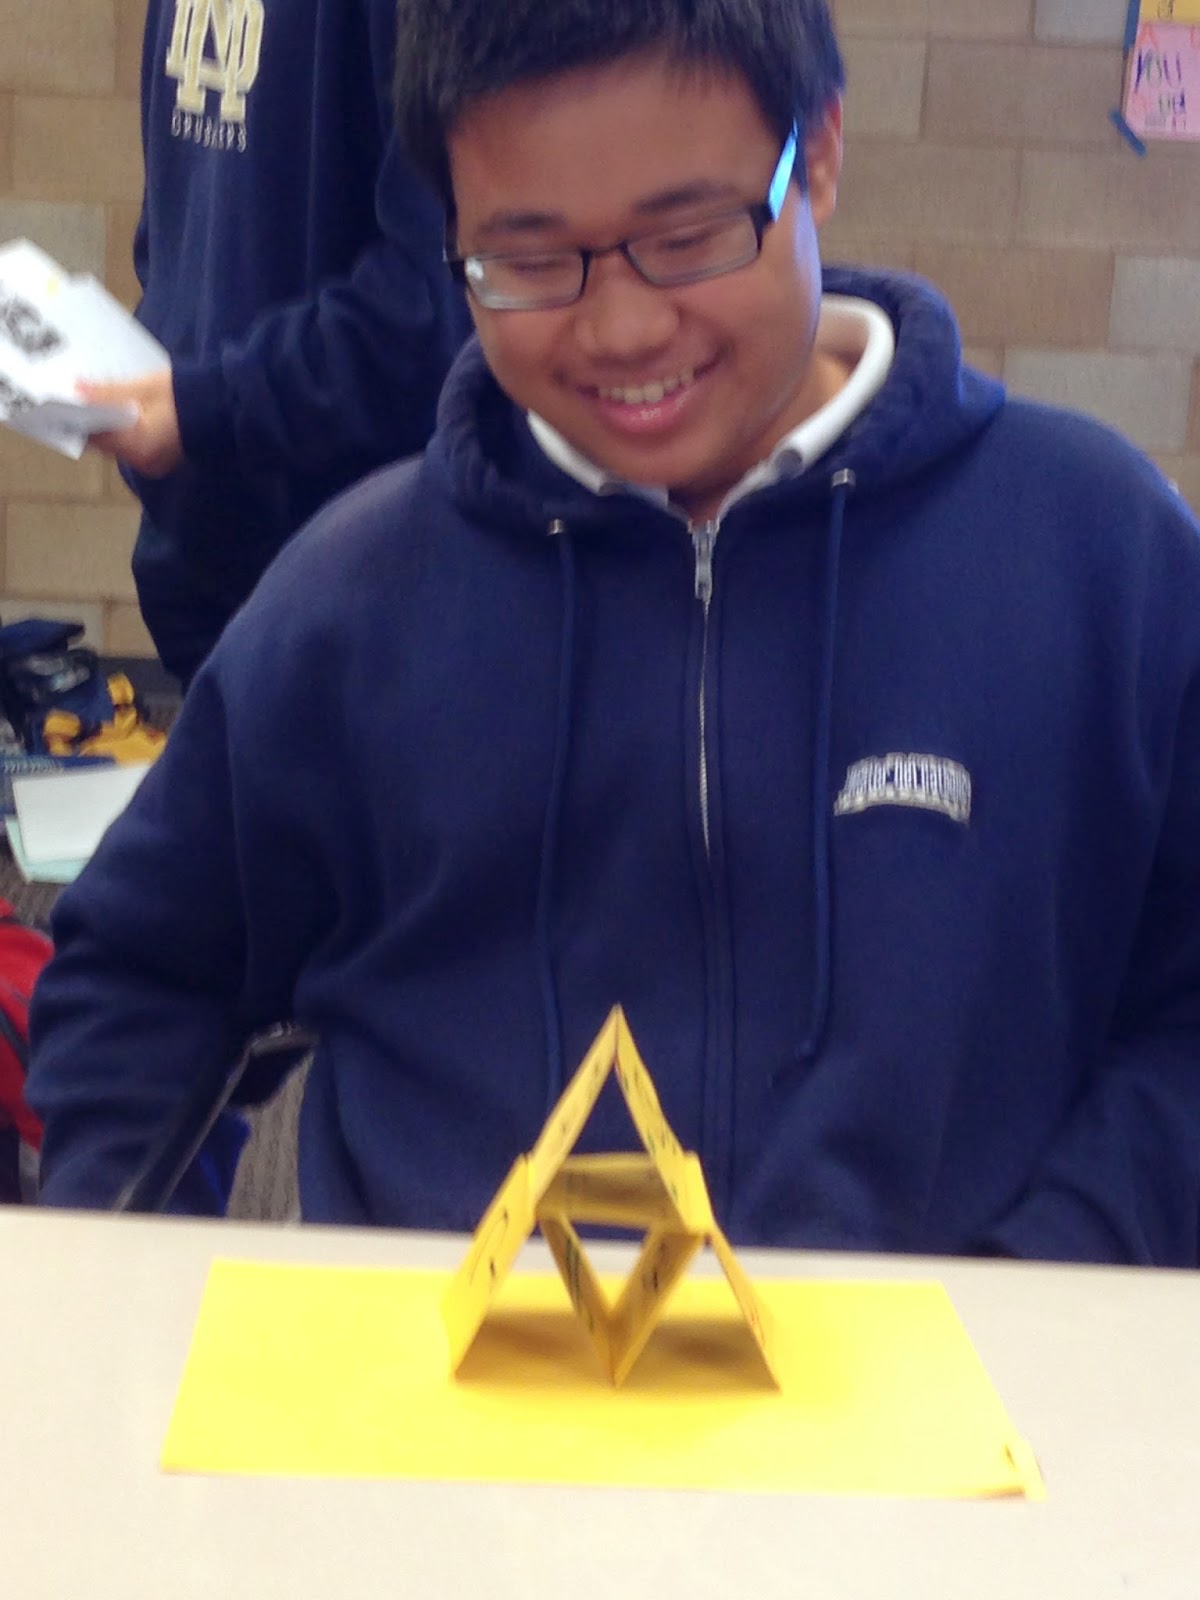
I love how their deck ended up mimicking the book cover colors
I'm sure you've noticed that I referred to a website called teachers pay teachers a lot. This is a great website because when I start to teach a new story or a new book. It lets me see what other teachers are doing and in many cases teachers will offer freebies.

In this case I found an great activity where students make a House of Cards for The Great Gatsby. This awesome activity comes from Brynn, who is a teacher in Kansas.

I have students do this in groups so it provides natural scaffolding.  My groups are hand selected and I take great pride in my groups right now. My juniors as a class started out not speaking a lot of English, constantly going with their own clique, and straying off task. It was difficult but I finally got them in small groups of 3 to 4 and they really work with each other. They get things done their productive it's amazing.

That being said, while I love them in their small groups, you could do it in pairs or on their own.


BEFORE 

  • Prepping Students: 
    • Symbols: We have prepped for this activity in a way since we started reading. Basically, they were reall familiar with sybols. We had talked about the eyes on the billboard and we talked about the greenlight. We also did an activity where students got to "Beauty and the Beast" it/ Where they turned the characters of the great Gatsby into nonhuman figures (e.g. sports, coffee, etc). 
    • The American Dream: I teach many non-native students, so we usually have a journal entry, and mini class discussion about what they think the American Dream is, what they think that other people think the American Dream is, and what they think Gatsby's version is.
    • Text: This could be done at many points, but I like to do it right after chapter 5.
  • Teacher Prep:  I went to Target to buy a deck of cards, but one deck costs $3.00 and two decks costs $5.00. I am all for spending money on my students when I need to, but I knew the Dollar Tree had them as well, so to the Dollar Tree (two packs for one dollar!). I have eight groups in my class. Each group needs 7 cards, but I gave them nine in case they made mistakes. That means two decks was perfect for my class. 

DURING
I draw this on the board to help my students
Materials: I used glue, paper, scissors, and markers. However, you could use sharpies, magazines, etc. Really anything as long as each "house" has seven cards.

Before I give them this assignment I show them a clip from the movie so they can see Gatsby's house. If you don't want to or can't show the movie, find a mansion for sale and show that. The key point is to make sure that they understand the opulence.

Finally, pass out the assignment, to create a House of Cards symbolizing Gatsby's house, where each card symbolizes something.I permitted the use of cell phones to pull up samples (e.g. one student wanted a specific rose to symbolize Daisy and she wanted to see a picture), but I emphasized that the explanation would be graded more than artistic ability.

My students did struggle a bit understanding which cards were supposed to go where, so I made this diagram and numbered the cards. This is an optional step, but it made their lives' easier and let me focus on helping people dig deeper into the text (instead of answering questions about directions).

The original assignment was to create a house of cards. I made this optional (for extra credit). After students had made the cards, and explained it, they could create a house of cards and send me a picture to receive extra credit (about half of a homework assignment)

POST
I love this assignment because it works on a higher level of understanding. Not only are they really grasping the ideas of symbols and metaphors. The coolest about this is that we're really working the metaphor figuratively and literally. 

After the assignment, their homework is to read Chapter 6 and answer the following questions:

1. Why are Gatsby's attributes the base of the house?


2. Why is Daisy's card between Gatsby and his dreams?


3. Now that you've read Chapter 6, how do you feel Gatsby's life like a house of cards?


4. Have your idea of Gatsby's version of the American dream changed? Why or Why not?

Answers will vary, but most of them show that they actually understood the project (which is the goal after all).

So there it is, I linked the product earlier, but again you can check out her freebie here It is free to sign up if you don't already have an account, just go here and get started on finding lots of great stuff!

Finally, I leave you with some pictures of my students who completed the house of cards. I swear they had fun, and there was learning going on as well.

Wednesday, March 11, 2015

Global Gazebo - Share Your Day to Day with Cultures Worldwide

I have had the opportunity to learn and teach with some amazing teachers when I lived in other countries. It is amazing to catch up and see what they are doing. You may remember I posted about my friend who was planning a trip for her imaginary student.

In this case a friend is working at a school where the students are trying to figure out how teenagers around the world respond to different cultural questions.

How cool right!

This is done as part of "The Aspen Challenge," an innovative cultural exchange project connecting students across the world. It encourages students to show their ingenuity, creativity, and teamwork to strengthen their leadership skills as they really let their awesomeness show.


The Washington Latin Charter School have set up a site called The Global Gazebo where students of all ages are invited to share their answers to different questions either in pictures or short videos via an app called Burst on their smartphone (Android or iPhone both work). If your students are unable to access smartphones you can e-mail them via theglobalgazebo@gmail.com with the video or picture.

This is all relatively short, and would probably take no more than 10 minutes for even a low level class. However, you could make it into a larger activity by looking at responses already given, discussing why they may be different from your culture and then putting students in groups to plan their answers. 

Since these students are high school students,the focus of the site is teenage, but responses from all ages are welcome.

I think this is an AWESOME opportunity, but it doesn't last long. Questions will be asked this week and next, but they stop collecting answers next week.

Tuesday, March 10, 2015

St Paddy's Day Goodies

Goodies!
I LOVE Saint Patrick's Day. I am probably more Irish than I am Mexican. I don't know much of my Irish roots, but I do love St Patrick's day. We're going 1-1 next year, and the tech team has been working ridiculously hard on getting everyone ready. As a result, I made these little "goodie bags" for the team, and a few other people who have made my first year at this school amazing.

Each of these lucky co-workers will get:
  • A Green Martini Glass (you could substitute wine, or a normal drinking glass, but these just looked so pretty!)
  • Green Easter Grass (used to fill Easter baskets)
  • A St. Paddy themed pencil 
  • DoubleMint Gum
  • A Gold Chocolate Coin
  • Andes Chocolate Mints
  • A Gold Mini Reeses (for the ladies in ring form modeled in this picture) 
  • A green accessory
    • For the boys it is a green fake mustache
    • For the ladies a green shamrock necklace

Different Colors!
These were easy and fun to make. Most of this was just separating different goodies into the green glasses. The rings were handmade and SUPER easy! I made a bunch of these so I could use them with my students as well. In the photo on the left I am showing off three different ones I made.

  • The green are for St. Patrick's Day
  • The yellow are as close as I found to gold (also St. Patrick's Day).
  • The blue are because my school colors are blue and gold.
I don't think these are quite as cute as the rings I made with Hershey's kisses (seen on the right) but I like the taste of Reeses better anyways, and you can use the same method with either candy.
You have THREE different ways of making these rings:

  1. With TWO pipe cleaners
    • Cross the pipe cleaners on a flat service 
    • Put the candy in the middle 
    • Pull the pipe cleaners up and over the candy and cross the pipe cleaners again  
    • Wrap the pipe cleaners around your finger and wrap the excess below the candy 
  2. With ONE pipe cleaner cut in half

    • Put the candy in the middle Cross the pipe cleaners on a flat service. Make one the cross asymmetrical so that two of the sides are shorter than the other two.  
    • Pull the pipe cleaners up and over the candy and cross the pipe cleaners again. Make the shorter sides combine with the longer sides.   
    • Wrap the pipe cleaners around your finger and wrap the excess around the other pipe cleaner 
  3. With ONE pipe cleaner
    • Put the candy in the middle of the pipe cleaner.
    • Twist the sides together.
    • Rotate the pipe-cleaner and flip to the other side.
    • Twist the sides together
    • Wrap the pipe cleaner around a finger/magic marker
    • Secure the ends 
You don't work well with my descriptions? Don't worry, I am not offended. Check out the video below (only for the one pipe cleaner)!


So those rings, and my dollar store decor get my students festive.

How do you get in the Saint Patrick's Day spirit at your school? 
My Cat is getting into the St Patrick's Day Spirit

Tuesday, February 24, 2015

Anti-Bullying Pink Shirt Day

February 25th is  Pink Shirt Day in Canada and in other areas that have picked up the trend.

Here's the story behind the name:

In 2007 at a high school in Nova Scotia, a freshman boy was bullied for wearing a pink shirt. Two senior students, David Shepard and Travis Price, saw this and decided to do something. They went to their local discount store, and bought seventy-five pink women tank tops. They reached out to their male buddies via social media and the next day they handed out the pink tank tops to all of the other boys who put them on over their normal tops.The bullies were never heard from again, and I am sure you can imagine the love that the bullied boy felt that day.

In honor of these teenagers who took a moment to right the world and do their part to stop bullying, every year on February 25th, people are encouraged to wear pink shirts and do their part to end bullying.

Here are some activities and reading you can do with your classes to celebrate.
  • Clean Paper
    • Give each student a piece of paper. Have them crumple it up. Rip it up. Scribble on it. My students have jumped u and down on it. Give them about one minute. Then tell them you want the paper back, in perfect form. Give them about five minutes to try and make their paper "perfect" again. 
  • Fill the Tube
    • Similar to the paper activity, but messier! Give each student a tube of toothpaste and a plate. See how fast they can empty their tube of toothpaste. Now give them a spoon and tell them to put the toothpaste back in the tube.
      • What lessons does this teach you?
      • Where do you see this in life?
      • Were any of you able to get your paper back to normal/toothpaste back in the tube? How long did it take?
You don't need to sacrifice a whole day to anti-bullying activities. You can still do a standard literature lesson with a bullying theme. Check out All Summer in a Day  by Ray Bradbury (You can find it in: A Medicine for Melancholy and Other Stories )

This is a fantastic story at a lower intermediate level. Lower grades may require more  scaffolding, but the

I have some pre-made lessons you can use.
My favorite question to ask students is what they think happened next. Did Margot forgive the other students? Did she and her family return to Earth? Were the students nicer to her after this day? Was the teacher punished?

If you are focusing on research or nonfiction, have them research Pink Shirt Day and come up with a similar activity their school could do. Have them write up letters to propose to the principal and samples. It would be a great interactive product that I am sure the principal would love!

What about you? What do you do to support anti-bullying in your class?

Saturday, February 21, 2015

Audio Book Quizzes

I usually share links to audiobooks as well. We read a lot in class, so I know they are practicing that skill, but sometimes listening is more convenient. They can listen as they are doing the dishes, showering, cooking and other times that it can be a bit difficult to read a book.

Secondly, it can help my ESL students hear proper pronunciation or words. Even with my non-ESL students, this is nice because when we read books like Things Fall Apart, they can hear the African names spoken as they should be spoken.

Finally, in some cases, they can listen to the text as they read it. In some cases there are websites set up to do this. For example, with The Great Gatsby  the website ESLBits actually has the text and the audio book on the same webpage. Even when the audio and text are separate, students can still read and listen at the same time.

Students can actually purchase mp3s of the audiobook (or often find them free online). In the future, I want students to create their own audiobooks, but for this semester I wanted them to do something a bit different.

In the case off Things Fall Apart, the chapters worked perfectly for the project I wanted to do with my class. Each student was assigned a chapter to make a triv that would help the other students listen and check comprehension.

Here are the steps and a finished project.

STEP 1 - Setting the Stage
We used a triv in the class, so students could see what they looked like. We have used these before, but if you haven't I'd be sure to use one.

In my class we had read Yeat's poem, "The Second Coming," to prepare to read, Things Fall Apart. The next class we did a quick review on the poem by using this triv. (Triv is what www.blubbr.tv calls their trivia games)

STEP 2- Explaining YouTube Videos
I introduce how to listen to the book on YouTube. Most students seem to really be amazed by this concept. They never considered looking for audiobooks on a site for mainly videos.


STEP 3 - Setting the Assignment
I treat this as an individual outside of school activity. They are each assigned one chapter. They need to find the chapter online, and use it to make a triv. We do a sample with the first two minutes of Chapter 1. They need
  1. Find an audiobook of their chapter
  2. To create a triv for their chapter
    • They need at least FIVE questions regarding the plot (or basic comprehension)
    • They need at least TWO questions regarding vocabulary (or literary /rhetorical skills)
They send these links to me and I share them with the rest of the class who can use them to study.

STEP 4 -  On Their Own
Then students are on their own! I made these videos to help them.

Here's the video on how to sign up for an account:


Here's one on making triv:


I love this project because students are helping one another, and they become experts on one chapter.

Here's a Triv one of my students made

How do you use Trivs in your class?

Thursday, February 19, 2015

Vocabulary Group Work

Happy Dance
Today was a good day!

I've been playing around with different seating charts since the beginning of the year. It has been tumultuous; we have had new students join the class, and some students go back to their home countries. Plus, the class has some very strong personalities.

Many of my past seating charts have been OK, but today I implemented "the one." It just worked! Students were collaborating on tasks (not just dividing up questions), they all stayed in English, and, most importantly, they actually stayed on task!

I was beyond thrilled. Today's lesson was a simple one, but to see it go so well made me ecstatic. My class is reading The Great Gatsby. Since this is a rather difficult text for ESL students, I took some time to pre-teach the vocabulary. I picked ten words that they need to know and we used them in the activity.

STEP 1- Modeling
I select one word from the chapter and use it as a sample. 

Contemptuous: showing contempt; scornful.

Since we can't use a word to define itself we look up contempt together

A combination of disgust and anger

Now we make a definition that anyone in the class would understand: When someone/something shows disgust and anger towards someone or something

To show they understand the word, they need to create a dialogue using the word. 
  • I usually need to remind them that dialogues are exchanges, meaning at least three lines between at least two people.
Then we "play" Whose Line is it Anyways? I ask the class what type of people would be talking that may be contemptuous. They shout out ideas, and I pick the ones that are the most outlandish (or easiest). Then I ask them to shout out a situation. They usually can't just shout out answers, so this is fun for them, but if you want, you can use this as a time to get shyer students to communicate by calling on them. 
  • Me: What types of people do we want to be talking? Who would make you feel contemptuous or be contemptuous?
  • Student 1: Teacher 
  • Student 2: Coach
  • Student 3: Dentist
  • Student 4: Doctor
  • Me: Awesome! Let's go with dentist. Where should the dentist be?
  • Student 5: Office
  • Student 6: Restaurant
  • Student 7: House
  • Me: Ooo, let's have him at the restaurant, So, I can say:

Waiter: Would you like to see the dessert menu?

Dentist: Is there anything sugar free?
Waiter: No, we believe in using lots of sugar.
Dentist: How dare you do such a thing? Sugar is a silent killer!
Dentist's wife: Dear stop being so contemptuous to the waiter. It isn't like he makes the menus.   

Once they understand the concepts

STEP 2- Assignment 
  • Each group is assigned one word. Be sure not to assign all of the words. You'll need one word not assigned to a group for Step 3. 
    • They need to look up their word, define it, and create a dialogue that they will present to the class.
  • Dialogues can be on ANY topic. This freedom really lets students have a little fun with it.
In my class I try to focus a lot on the difference between, "dividing and conquering" and collaborating. This is best done as a collaboration! Everyone pitches in and brings their own ideas to the table.
STEP 3- The Twist
  • Take the word that you haven't given to a group and tell the class you will be modeling what they will present to the class.
  • The twist!
    • Teacher in a deeper voice: What makes you think your boyfriend is cheating on you. Did he tell you? 
    • Teacher in a higher voice: No, but there were clear intimations
    • Teacher in a deeper voice: Like what?
    • Teacher in a higher voice: He didn't always answer his phone, and he stopped using my name. He always called me, "Baby," or "Sweetie."
  • Ask students what they think the word intimation means? 
    • Field guesses and help them come to the correct definition if they can't figure it out on their own.
  • Explain that they will be presenting their dialogues FIRST and then helping the rest of the class figure out the meaning. 
    • Give them a little (I did two minutes) more time to make sure their dialogues are ready or to practice.
This is the part that makes the lesson really interactive. Students aren't just presenting to the class; they're helping them discover what the word really means. The rest of the class isn't just taking notes; they are trying to guess!

STEP 4- Listening

  • As each group presents, the rest of the class listens and guesses what the word means.
    • I hardly had to give any guidance today, but feel free to help your students focus or give them clues if they struggle. 
STEP 5- Final Product
  • Students take all of the words presented (including the two from their teacher) and make either a short story or another dialogue. 
    • If you want to add a technological aspect, you can have them make a comic stop on bistrips
    • There's a short story app for Windows 8.1 and higher called Chekov
    • You can also choose to make it a speaking task by using the sock puppet free app 
    • And many many more! 
  • I refuse to give more help with the definitions. If a student asks what a word means, I ask the group who originally presented on it to help. Otherwise, I point out the dictionaries sitting in the middle of the group's table.
Voila! Your students should feel fairly comfortable with these words, They've worked in a group, presented to the class, listened to others, and practiced writing.

Again, this isn't a new concept or activity, but it worked so well today I wanted to share it.

      Wednesday, February 11, 2015

      Infographic Project - Charity Based Research

      My students have done infographics before to practice argumentation and essay structure. This project uses infographics again, but this is a different project that is much more non-fiction and research based.

      This project has tons of technology and websites.

      I am really excited about it, and about being able to post about it. In total the charity infographic project took three classes, but there was very little homework. I am listing all the steps together here and you can divide them as needed, take steps out if wanted, or add to it. I actually did a bit more (e.g. I worked on using notecards) but here are all of the infographic based steps:
      1. To start, I pass around a sheet of statistics on a topic we are covering: in this case GMOs.We quickly review the statistics and go over whether they are for or against GMOs. Then, I ask students how interesting that was. Most of them say not very.
      2. Using infographics I found online earlier, I show them 10 different GMO statistics we go over each infographic and decide: how does it look, how are the facts, and is it for or against GMOs.
      3. Students on their own think about what they liked about infographics, and what they didn't. What seemed to work, and what fell flat. After some individual work I let them share with a small group, and then we discuss it as a class.
      4. In small groups (2-3) students are assigned to select an infographic about anything they want. They need to know 1. Why they picked the topic 2. Why  they liked it
      5. Students made short presentations on their infographics.
        1. The goal of 1-5 is to introduce students to the topic of infographics and have them get a feel for what they like and don't like. What colors don't work well. When is too much on an infographic too much? Is white space good or bad? etc.  For me, 1-5 took one 90 minute class.
      6. Finally, I let the students know that they will be creating their own infographic on a charity. 
      7. I gave them an approved (they had to be within the guidelines of the school) list of charities and told them to pick whatever one they wanted. They could also pick a different charity, but the school administrators would need to approve it. In groups of two-three students selected a charity.
      8. We went over good sources vs bad sources (we covered this before) and I let them research away. If a student started researching and realized they didn't like their charity, they were allowed to switch.
        • My students spent an entire class researching. While some finished early, most were really working the whole class period. For fast finishers however go to step 9.
      9. After I noticed some students had quite a bit of reliable research ready, I showed them http://piktochart.com/. There are other infographic sites out there, but (for reasons I will discuss in #15) I prefer to use this one. If done researching, students could create an account and begin playing on the site.
      10. I show them an infographic that I made on a charity (I selected one they didn't choose as an example). We go over what we like and what we don't like. We look at the organization pattern, the charts, the visuals, the colors etc.
      11. Examine and review infographic assignment.  Be sure that students understand everything they are expected to do.
        • Using the rubric on the assignment have students grade my infographic.
          • I usually make a few typos, or choose a hard to read font to make sure they give constructive criticism.
      12. Give a quick tour of Piktochart. I like having students learn on their own, but giving them a good start is usually a solid idea.
        • How to sign up
        • Where to start
        • Free vs Paid
        • How to undo
        • Where to find pictures
        • etc.
      13. Allow students to work on Piktochart
      14. Have students submit their Piktochart to me. I make corrections and give it back to them. 
      15. Model Presentation (This is why I like Piktochart! Some other sites have this option as well though.)
        • Using Piktochart's presentation mode I give a presentation justifying why I selected my charity. 
        • I am always sure to make a few easy to spot mistakes so students can correct me
      16. Have students grade my presentation
      17. Let students create their own presentations
      18. Students present their infographics to the class
      19. While presenting, students evaluate the infographic and the quotes
      20. Finally, my students evaluate themselves.
      DONE...for now. There's actually a final part, where my students raise money for the charity, but I'll save that for another post.

      For now, I'll show you some of my favorite infographics my students created. Click on the charity name to see the whole infographic.

      • San Diego Hunger Coalition was a group that really took advantage of all piktochart had to offer. They had fun picking different backgrounds, and they stuck to small chunks of text (rather than writing everything down). This group was a clear division of labor. One person researched cool facts and statistics, and the other person played on Piktochart until they found the perfect look. Normally I am more a fan of collaboration (rather than divide and conquer), but this group was persistently communicating, so it seemed to work well for them.  
      • L'Arche This student really had fun with the graphics. Every block in her presentation has the same theme, and all of the visuals go with one another. She also added little details where possible. For example, one of the graphics was of a person and it didn't include eyes, so using the shape tools she added them. Her partner missed a few days of school, so she did most of the work on her own, and I was really proud of the final product.
      • Build a Miracle Group was big into incorporating the graphics into the block. That is, nothing was ever stand alone, it was almost one big picture. They also found really great facts to support donating. This group was also one of the most prepared groups when it came to donating. They really worked hard to know their stuff and came across as quite knowledgeable.
      • Finally, Las Hermanas San Diego was a really fun group! They went outside the box a bit, and used the graphics in ways that weren't normal. For example, they used rectangles as surfboards, and put people in normal clothes standing on them to make surfers! Adorable!
      Thanks so much for sticking around for the whole post! This really is a fun project it helps teach students about:
      • the good charities do
      • research skills
      • visuals
      • learning how to use new computer programs
      • working in a team
      • organizing their thoughts
      • evaluating one another
      • self evaluating
      And of course, the writing and speak skills I am focusing on in my speech class were there (grammar, intonation, transition words, volume, etc.)

      I have the worksheets I used available for purchase at TeachersPayTeachers  if you are interested. You can also download the preview for free to see part of it.
      Related Posts Plugin for WordPress, Blogger...